
Wrench or How I Learned to Punch Gizmos
Hey SlugFans,
A few weeks ago we launched our customer feedback survey and one trend we noticed was this little monster was terrorizing taverns (and players):
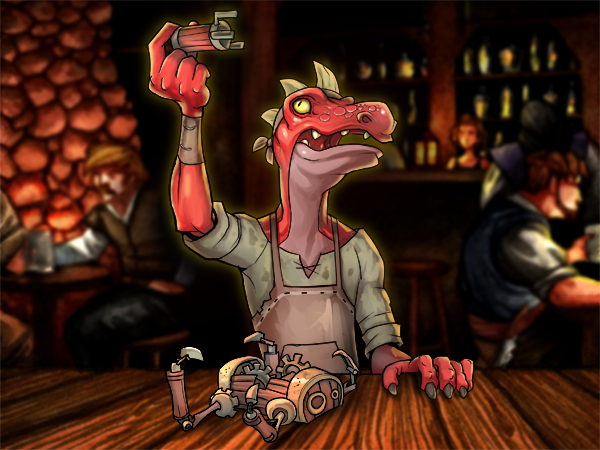
For those of you who don’t know, this red kobold is Wrench, an Ally expansion for The Red Dragon Inn. We think the poor little guy is getting a bad rap, so today we we decided to share with you a little bit of insight into defeating Wrench and his reign of adorable mechanical terror.

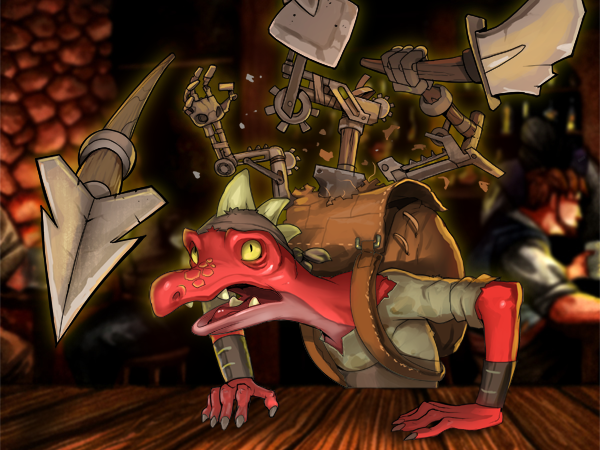
Wrench’s greatest strength is his unprecedented action economy. All of his actions persist across at least two turns, essentially doubling, tripling or quadrupling their effect! This makes him a surprising and frightening offensive powerhouse, and essentially ensures kobold victory if he’s allowed to get out of hand. So what’s the best way to deal with a clockwork army? Punch them all in the gearbox!
Wrench’s Gizmos may be the target of Fortitude-Loss Action, Sometimes and Anytime Cards. Dealing Fortitude damage to his stuff will seriously reduce the efficiency of or outright destroy his Gizmos. On top of that, anytime a Gizmo meets a tragic early end, it explodes violently, dealing Collateral Damage to Wrench, which is unavoidable Fortitude Loss!

The majority of Wrench’s Gizmos that you need to worry about (i.e. the ones hit for more than 1 Fortitude) usually have 3 or less Fortitude. That means when one of these guys ticks down, it’s sitting at a juicy 2 Fortitude, which also happens to be the most common amount of Fortitude loss in the game. Nearly every character can deal 2 Fortitude loss with an Action or “hit back” card, meaning nearly every character can one-shot a 3-Fortitude Gizmo that’s ticked once. Heck, a “hit back” card is almost guaranteed to destroy a Gizmo since there’s no way for Wrench to heal it before it suffers lethal damage, and the only way he has to protect it requires sacrificing a different Gizmo!
As an added bonus, many characters also have 1 Fortitude loss cards that normally aren’t all that exciting. These are some of the best cards for dealing with Gizmos that are on the edge of winding down (especially Bear Trap).

Wrench’s Gizmos are also subject to “each other player loses” effects. A well timed “drunken rampage” or “rowdy drinking song” can spell the end for a whole lot of Gizmos all at once.
Fun Fact: Pooky is Wrench’s worst nightmare. Because Wrench is typically “death by a thousand papercuts” Pooky will basically always be on full tilt, getting the best value out of his Action Cards all of the time. So as long as Pooky avoids the Bear Trap, you better prepare yourself for a very angry furball of teeth and claws!

We got a lot of comments stating that it felt like a waste spending your action to destroy a Gizmo. Think of it this way:
Every time you successfully destroy a Gizmo, you get to hit Wrench for 1 unavoidable damage.
That’s crazy! Unavoidable damage is a huge problem for Wrench. He has very few defensive options to keep himself safe without sacrificing his Gizmos. Furthermore, he has no ability to recover Fortitude outside of a lucky draw from the Drink Deck. Whatever damage Wrench suffers will stick and slowly wear him down. Furthermore, if you know Wrench will continue to aim his Gizmos at you for the rest of the game (like when it’s down to just the two of you), anytime you destroy one of his Gizmos you can be saving yourself from 1-4 damage later.

With everyone in the party armed with the knowledge that attacking his Gizmos is a good thing, what’s a little kobold to do? Well, Wrench has a number of powerful tricks up his sleeve, and a clever Wrench player will take advantage of them.
One key thing Wrench needs to do is make sure his Gizmos stick around at 3 Fortitude. Generally speaking, a Gizmo at 3 Fortitude is very safe because your opponent will need to spend a high-powered card to destroy them and some characters simply can’t add up to 3. That means occasionally using your “This would be perfect for oiling the gears!” on someone else’s drink (like Holy Water!). It’s impossible to keep an unlimited number of Gizmos that healthy for too long, so the clever Wrench player will know which Gizmos are important to keep alive, and which ones he can sacrifice.
Speaking of sacrifices, while Wrench doesn’t have many ways to avoid Fortitude loss, he does have two copies of “Noble sacrifice”. These are your magical, super important cards, and you should save these cards for those dreaded “Each other player loses” cards.
Other than the specific mechanics Wrench has available to him and his Gizmos, there’s also simply the way you play him. If you are flooding the table with Gizmos you are going to draw a LOT of attention. It’s like Gerki winning a hugenormous pile of gold. Doing something BIG will paint a huge target on your back, so focus on the little things. Emphasize your defensive Gizmos and trickle feed your offensive ones throughout the game. Of course, dialing it up to 11 and dropping a Lightning Generator and Bear Trap on the same turn is incredibly satisfying, but you just need to be smart about when to do that sort of thing.
Wrench definitely brings a lot of innovation to the table and wildly changes how players typically approach the game. He’s the most complex Ally we have released to date and we love how he really shakes the game up. Now go forth, party members, and start stomping on some Gizmos!